How To Apply Liquid Gel Nail Polish at Home
Going to the salon every month to touch up your gel manicure can get expensive, but for some, trying to learn how to apply it on your own is just too nerve-racking. But with the right tips, tricks, and a little practice, you can save a lot of money in the long run. Learn how to apply liquid gel nail polish at home so you can have beautiful nails whenever you want, for a fraction of the cost.
What You’ll Need
Whether you’re new to DIY manicures or you already have a nail kit, you’ll need a lot of supplies to get the job done and get it done right. While, unfortunately, this is the most expensive part for some, it’s minuscule compared to how much you’ll save by doing your nails at home. And with today’s technology, most of these products have become much cheaper to purchase.
The first and most important thing you’ll need is a UV or LED light. However, only use an LED light if the polish you buy is LED curable. Curing is the part of the process that hardens the nails and makes them last for weeks. An LED light helps cut down the length of the curing process. However, you will need to cure in between layers, but more on that later.
You’ll also need cuticle oil and a cuticle pusher. Cuticle oil helps prep the nails and keep them from drying out, and a cuticle pusher gives you more space to work with. Both tools make it easier to achieve a smooth and professional appearance. You’ll also need a nail buff, a nail clipper, and a nail file to prep the nail and achieve a smooth canvas. Luckily, most people already have at least some of these tools on hand; if not, they’re inexpensive and easy to find in stores or online.
Finally, you’ll need rubbing alcohol, a top and base coat, and whichever color gel polish you want to use. Choosing the color is the easiest and the most fun part of the process. However, you may want to stop yourself from overbuying and purchasing an entire collection, at least until you’re sure that doing your own manicure is right for you.
Prep Your Nails
Before anything else, you want to ensure that your hands and nails are completely clean. You can keep it simple and wash your hands with soap and warm water, or do an entire steaming, massage, and wash routine. Do whatever makes you feel fancy, as long as your hands are washed and dry before you begin the manicure. Once you’re done, you’ll want to break out your nail clipper and your nail file. To avoid damaging your nails, use a soft or medium grit file, and don’t go over a 180 grit.
Shaping your nails can be the scariest part, especially if you don’t want to ruin months of nail growth. Regardless of the shape you want, trim a little at a time and never straight across, even if you want square or coffin nails. Also, your nail clipper will never give you a perfectly smooth shape, so your goal is to cut off the excess nail and let your file do the shaping. Don’t worry about any rough edges your clipper gives you if you have the general outline. Trimming too much too fast usually causes nails to break, especially for those with curved nails.
After giving your nails a general shape, you’re ready to file. However, the biggest mistake beginners make is filing in a back-and-forth motion. This can cause your nails to crack, break, or get micro tears. Only file in one direction to protect your nail and give the edge of the shape a smooth appearance.
Next, ensure your cuticles are nice and soft so they’re ready to be pushed back. If they’re stiff, soak them in warm water until pliable, then gently push them back with your cuticle pusher. You can also take this time to remove dead skin and dirt from around and underneath your nail. Once you’re finished, you can apply your cuticle oil and let it absorb into the nail. Once your nails are nice and hydrated, you’re ready to buff.
Buffing is excellent for keeping your nails smooth and shiny and giving the polish a place to adhere. Angle the buffer parallel to your nail, going in one direction, and make an X. Do this gently until you see your nails start to shine and any thin ridges start to become smoother. Finally, rub off the excess powder with your rubbing alcohol and let it dry. Once you’re done, you’re ready to start painting!
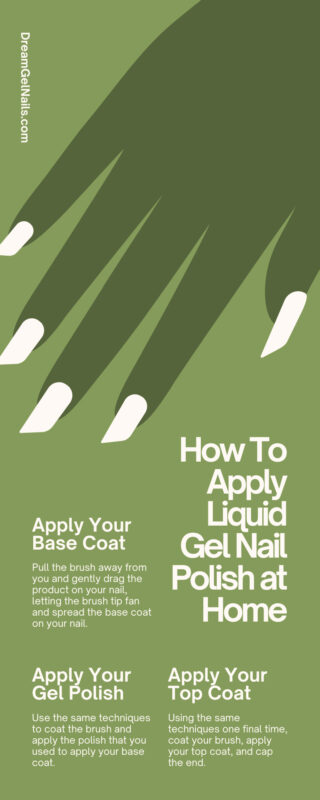
Apply Your Base Coat
This is where the fun begins. Now that you’ve finished prepping your nails, you can apply your base coat. When removing the brush from the bottle, wipe the brush on the rim so the brush fans and is evenly coated. You’ll want to do the same when re-dipping your brush. Never dip the brush straight down. If you notice your hands are a little shaky, extend your pinky and use it as a support to keep your hand steady.
Pull the brush away from you and gently drag the product on your nail, letting the brush tip fan and spread the base coat on your nail. You may need to come at it from the sides using the same techniques to ensure that your nail is completely coated. You’ll also want to cap the nail by painting the very edge of the tip to create a strong hold. Let the base coat cure under your UV or LED lamp for 30 seconds to a minute before continuing.
Apply Your Gel Polish
After your base coat has cured, you can apply your gel polish, but be sure to shake the bottle thoroughly so the product is properly mixed. Use the same techniques to coat the brush and apply the polish that you used to apply your base coat. You’ll also want to cap your nail here as well. If you make a mistake, you can wipe off the edges before curing. Your first layer may look a bit streaky but apply thin layers until you get the desired opaqueness. Then cure your nails again for 30 seconds to a minute.
Apply Your Top Coat
Using the same techniques one final time, coat your brush, apply your top coat, and cap the end. For your last round of curing, you want to cure for at least one minute to ensure that the polish is completely cured. If you’ve cured for a minute but feel a sticky residue on the top, that’s normal as some products tend to leave behind a tacky feeling. You can wipe this off with a cotton ball if it bothers you. Just make sure that your nails are completely cured. Sometimes polishes and tops coats will tell you how long their product needs to be cured.
Although it might seem like a long process, learning how to apply liquid gel nail polish at home is easy and becomes quicker every time you do it. For manicure lovers with sensitive skin that hate the harsh removal process, Dream Gel has a revolutionary soak-off gel polish so you can remove your manicure without having to use acetone.