Everything You Need To Know About Builder Gel for Your Nails
Builder gel adds thickness, strength, and length to nails. Weak nails can benefit from builder gel, and people who want length with less stress on the natural nail may prefer builder gel over acrylic nails. Understanding how to use builder gel properly is important; here’s a guide to everything you need to know about builder gel for your nails.
Why Use Builder Gel?
Builder gel creates nails that are strong but also flexible, which reduces breakage. Available in white, clear, or natural shades of pink that closely resemble the look of unpolished nails, builder gel provides a more natural-looking nail than acrylics while adding shine.
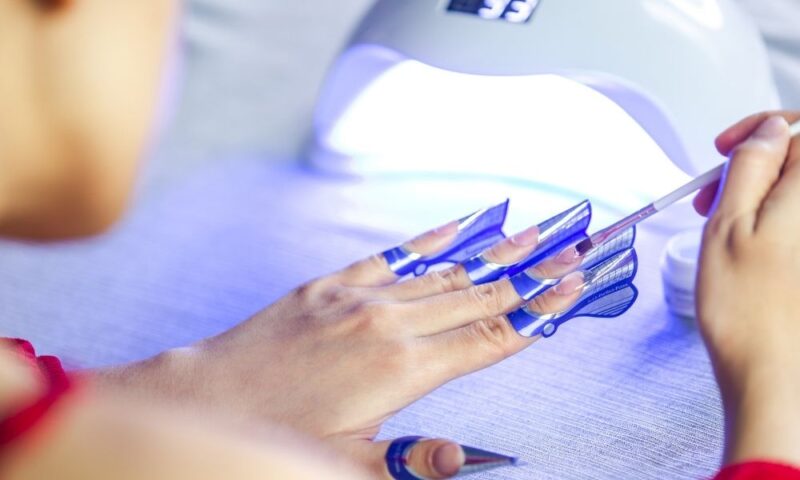
Unlike acrylic nails, builder gel nails must be cured under UV or LED light. For that reason, they’re a bit more forgiving than acrylics, which dry more quickly. You don’t have to worry about mixing acrylic powders with monomers to apply the builder: liquid builder gels for nails come in bottles with brushes included or in pots so that you can use your own brush to apply the gel. You can use builder gel as an overlay to strengthen nails or as a base for gel polish.
Types of Builder Gel
There are two types of builder gel for nail: hard gel and soft gel. Hard gel is more like acrylic, except you must cure it under UV or LED light. It can add greater length to extensions than soft gels, typically lasting three to four weeks. It also requires professional removal, as improper removal can damage the natural nail. If you’re a fan of very long nails, hard gels will get you the result you want.
On the other hand, soft gel is durable, but it can’t create the super-long extensions that hard gels and acrylics can form. Soft gel strengthens nails but remains flexible, which can reduce breakage. They create a lovely, natural-looking nail on their own, and they can also serve as a base coat for gel polish.
Soft gel self-levels, meaning that as you apply it, the gel will even itself out across the surface of the nail, which is a boon for beginning users. Soft gels come in soak-off formulations; nail technicians apply a cotton ball soaked in acetone to the nail and then wrap the nail in foil to allow the acetone to work. In 5 to 10 minutes, the gel will become soft enough to simply wipe away.
Preparation Is Critical
Nail preparation is important for all types of manicures, but when you’re using builder gel, be sure to follow the brand’s instructions, and stay within the same brand if you’ll be using gel polish and topcoats with the builder gel. Prior to using builder gel to strengthen or lengthen nails, make sure the natural nail is clean. File and buff the nail and push cuticles back; then, wipe the nail clean.
Some builder gels advise using a primer to dehydrate the nail, followed by applying a base coat. If no primer is necessary, you can move on to applying the gel itself.
Applying Builder Gel
If you’re using soft gel, brush on the builder gel, being careful to avoid the cuticle and the skin at the sides of your nails. Extend the gel to the free edge and allow it to settle for a few moments to let it self-level.
For hard gel, a nail technician will apply a small bead to the nail and move it around with a brush to form the desired shape and length, often using a nail form to extend the nail.
A few pro tips are to do no more than two nails at a time and to cure them before moving on to the next set of nails. That way, you’ll avoid oozing and mishaps and retain the shape and thickness you want for each nail.
If necessary, apply a second coat of builder gel for thickness, shape, or strength. Once the gel has cured, clean the nails with a lint-free wipe and a brand-recommended cleaner (often isopropyl alcohol) to remove any sticky residue. Then file the nails and clean them again to remove dust.
Once the nails are cured, clean, and ready, you can apply the gel polish from the same brand in the color of your choice and follow it with a topcoat. Finish the manicure with a bit of cuticle oil.
Pro Tips for Success With Builder Gel and Gel Polish
Keep your layers thin. You can always apply a second coat if necessary. If you’re using hard gel with nail forms, start with a small bead at the base of the nail, avoiding the cuticle, and drag it toward the nail form to the point that corresponds with the length you want to create.
If you make a mistake while applying gel builder or gel polish, you can wipe it away if it hasn’t cured yet. But don’t apply gel builder or gel polish outside or near a window with direct sunlight. The gel will start to cure in the UV rays before you’re finished applying it, which may ruin your manicure. You’ll have to soak it off and start over. Be sure to store gel nail products out of the sun.
To help your gel manicure last as long as possible, wear gloves when you’re washing dishes or using household cleaning products. These cleaning agents can damage the polish, creating chips or causing peeling. Never pick at or try to peel off gel nails. Gel builders, polishes, and topcoats are made to be strong and durable. Trying to peel them off if they get chipped risks ripping the natural nail underneath, which could take months or even years to heal. Always follow the manufacturer’s instructions on safe removal of gel nail products.
Never apply gel builder or gel polish—or any polish, for that matter—over infected or bleeding nails or nail beds. You’ll only seal in the infection and allow it to worsen, risking losing the nail entirely and potentially making yourself terribly ill.
Builder gel is a wonderful tool for creating strong, lovely nails. With everything you need to know about builder gel for your nails, you should feel confident applying gel nail products yourself or in selecting a nail technician who’s experienced in proper gel nail product application and care.